June 24, 2020
Whether you're new to continuous glucose monitors or a seasoned veteran, keeping that CGM in place can be an ongoing battle. From mildly annoying inconveniences to a serious impact toward quality of life, we device wearers need all the help we can get to keep these devices attached as long as possible. Can we agree that no one wants to be sitting on the sidelines at a pool party or anxiously waiting on a replacement because your CGM is literally holding on by a thread?
So, let's break it down:A Freestyle Libre is MEANT to stay on for 14 days, and a Dexcom G6 for 10. So, why does it feel completely unrealistic?
There are tons of factors that affect a CGM wearer’s ability to keep something stuck and your skin is a variable thing. Dry or oily skin, frequent exercise, sensitivity, and movement of that particular part of the body; users everywhere struggle to keep a device on for the amount of time it’s supposed to. This leads to the constant struggle of trying to get more sensors from an insurance company because they didn’t last as long as they should have.
So, back to the burning question: how do you keep a CGM on for the allotted number of days? The answer to that can be different for everyone, but we've put together a few tips we've found to be super helpful for keeping your CGM (or pump) stuck!
The first thing to keep in mind when placing your CGM is to follow the instructions. Yes we know, “Thanks! I never tried that! Duh…” Yeah, yeah we get it, but hear us out! With a Dexcom G6, placing the insertion device against your skin and pressing a button might seem pretty straight forward, but cleaning the area beforehand and gently rubbing down the white adhesive area can make or break your ability to keep it on for more than a few days. (We’re ALL guilty of skipping the cleaning step sometimes, but it can definitely help!) Be sure to read the instructions thoroughly and follow each step when placing your CGM.
Avoid placing your monitor on your body directly after, or directly before, a shower or bath. Wait at least 2 hours so that the skin no longer contains any residual “wet-ness.” This is because it might take multiple hours for the adhesive to fully “set.” If you shower in the morning, try to schedule your sensor changes right before bed. If you shower at night, try to schedule them for the morning. This will ensure that you start your two weeks with a strong adhesive foundation.
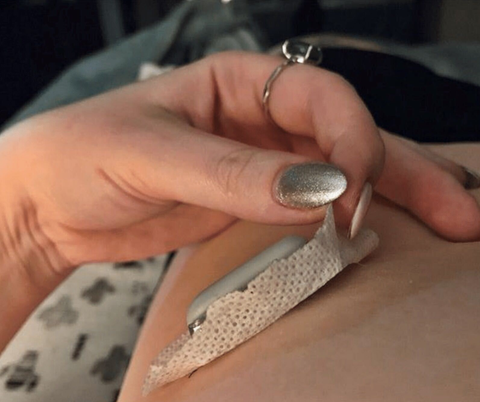
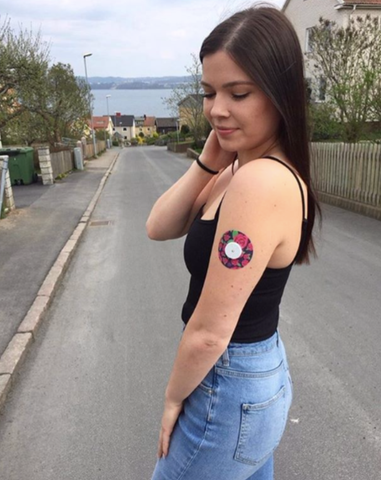
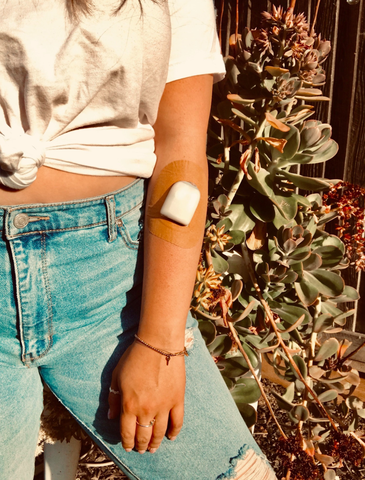
CGM covers or tapes have been created specifically to help keep your device secure and remain in place for an extended amount of time. This is a relatively new product for CGM wearers and people are LOVING them. Tapes that are placed directly over the sensor can help it stay attached for as long as you need.
When searching for brands of tapes, quality is everything. Waterproof is a must, and anything that's a 'woven' style will fray on the edges with the first day or two
Brands like ExpressionMed have built their entire company around creating the highest quality tapes that are life-proof, but easy on your skin. They are changing the game for what it means to wear a CGM. (Some customers are claiming the tape kept their sensor on for over 3 weeks!)
Tape Application Tips:
You can apply your overlay tape directly after placing your sensor, or wait until it starts to peel. Follow the same rules you use for your CGM and avoid applying directly after or before showering.
And whatever you do, DON'T touch the sticky part of the adhesive with your fingers! It's the most common mistake in tape application and is the quickest way to compromise the integrity of the adhesive.
Skin glue can be good for CGM’s if you struggle to keep your CGM on even with the above advice. Available on amazon or at any pharmacy, clean the area and then apply the product to the area you intend to place your device. Most patients with diabetes who use glues, will do so in addition to an overlay patch or tape for extra security. Keep in mind that skin glue can make removing your device more painful, and might require additional cleaning solutions to remove the adhesive residue from your skin afterwards. Be especially mindful if you have sensitive skin.
Pro tip: Apply a little glue under any lifts or folds in your adhesive as they come up mid-wear to avoid major lifting and extend your wear-time.
The final piece of advice for keeping your CGM on is to be mindful when placing the device on your body.
Safety First: The safest place to wear a device is where you get accurate readings, so if you are trying a new site, make sure to check in with a meter and test strip throughout the day to ensure your safety. If your readings are accurate for the full wear time: Yay! You just found yourself a healthy new site. You can give the old one some much needed R&R.
Consider your lifestyle: If you (or your child) is constantly playing around in the sand, an “out in the open” set like arm or leg might not be for you. But if you find yourself at a desk job, or not exposed to a lot of obstacles, those two sets might work perfectly! It’s all up to you.
Avoid the fold: Everyone has skin rolls, especially on their stomachs. When placing a device on your abdomen, which is required by companies like Dexcom, try to avoid the natural folds in your skin so that it doesn’t peel up the edges every time you bend over. This will also prevent the adhesive from getting overly stretched out when you do that big morning stretch when you wake up. The skin on the abdomen is one of most flexible and mobile areas where a CGM might be placed, so keep this mobility in mind when placing your pump or continuous glucose monitor.
Learn more…
For more advice or to learn more about overlay tapes, email hello@expressionmed.com or contact your health care provider.
**Be advised: The author of this blog is a diabetic of 13 years, a Dexcom G6 and Tandem t:slim wearer, and not a healthcare professional**
Header image: Photo credit Emily Schueler